 I recently asked my production manager and the graphic department manager here at Marsid M&M:
– What is the most common mistake that you find in artwork submitted by customers?
Answer: Missing Bleeds.
They also added that it is one of the biggest causes of delays in the customer receiving their order. It’s a fact that many businesses hire outside designers and when we contact the customer about the missing bleeds, it can take a matter of minutes to a matter of days to get the adjustments made by their designers.
Unfortunately our graphic department cannot always add the bleed because the file is not editable which is a whole other blog post (coming soon).
If we can add the bleed ourselves, we do it free of charge as a courtesy to our customers.
What is Bleed?
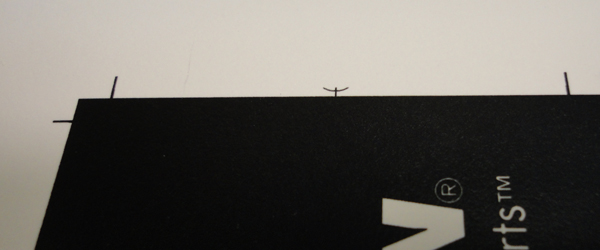
Some designs contain graphics or solid backgrounds that reach the edge of the paper as shown above. Printers require an additional stretch of these graphics or solid backgrounds, usually about 1/8th of an inch called a “Bleed” in order to guarantee the edges are not left without ink when the paper is cut.
Quick tutorials: Adding bleed to your artwork
The easiest thing to do to prevent forgetting to add bleed is to simply make a bleed guide as the first thing you do when beginning a new design. Some professional design software makes this incredibly easy to do, some you have to do manually (still pretty easy).
 Adobe Illustrator:
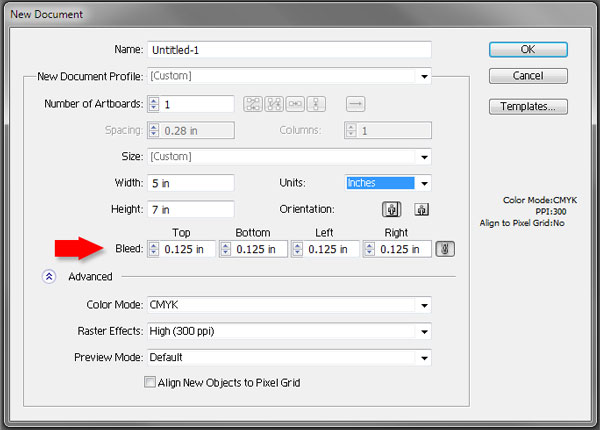
Illustrator offers one of the easiest and most convenient ways of adding bleeds to your documents from the start. In the “New Document” dialogue, under “Bleed” enter 0.125 in to any of the columns. If the link chain is selected already, then it will populate all 4 fields with 0.125 in automatically.
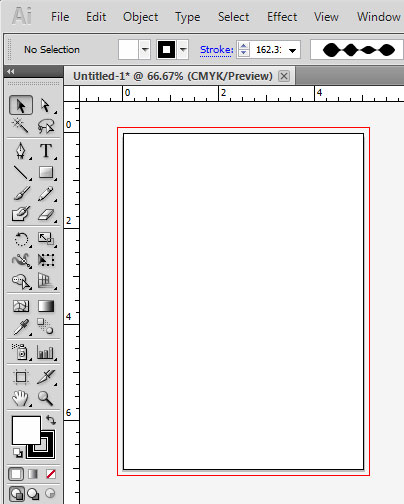
As you can see below, your bleed lines are added automatically. Shown as a red frame around the artbox…
 Adobe InDesign:
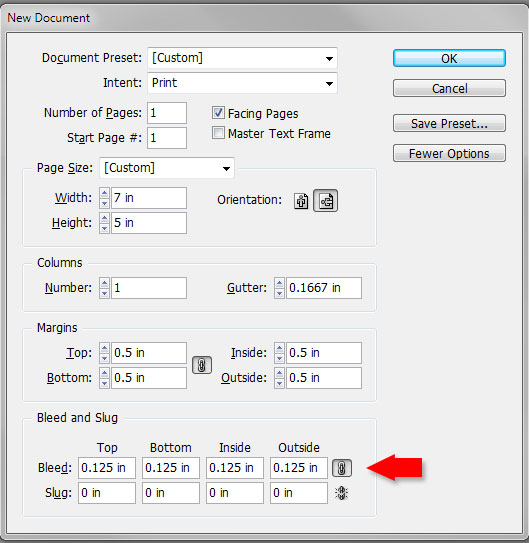
In the “New Document” dialogue, make sure the “more options” button is pressed and at the bottom has a “Bleed and Slug” section. In the bleed box type 0.125 in and if the the link chain is selected it will automatically add it to the other 3 boxes.
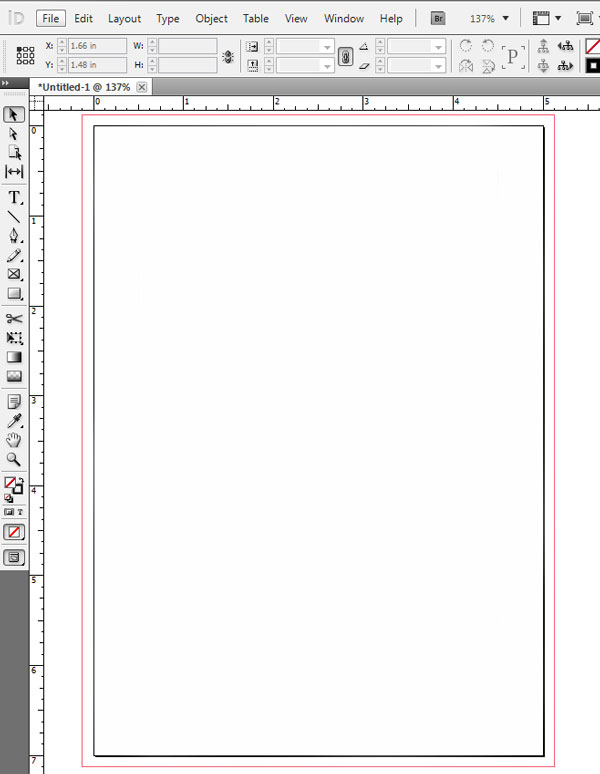
Similar to Illustrator, InDesign automatically adds the red frame around the artbox as a guide for bleeds…
 Adobe Photoshop:
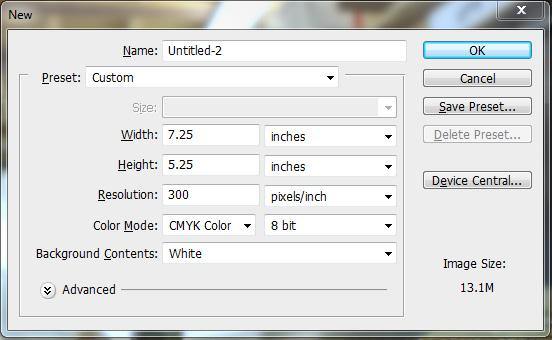
In the “New” dialogue window, add 0.25 to the desired finish size. For example, if your designing a postcard that has a finish size of 5 x 7, then you would enter 5.25 x 7.25.
Once you click OK, your empty canvas will appear and we will use the Rulers (View>Rulers) to use as guides to center our 5 x 7 within the 5.25 x 7.25 canvas and therefore make the bleed areas visible. Pull a guide from the ruler for each side of the canvas and drag it until it is 1/8th” inside the canvas from the edge.
Photoshop Note:
We do not suggest using Photoshop for layout and typesetting of print projects. For best results use Photoshop for image manipulation and special effects. Import or place the image or object in Illustrator or InDesign for layout and typesetting.
Photoshop is a raster design program which uses grids of pixels to compose an object. Illustrator and InDesign create vector art which is composed of lines and curves or “Paths” to create objects and therefore create sharp edges and lines for both objects and text. Vector can also be scaled to extremely large sizes without losing quality.
Bookmark Worthy: Print-Ready Design Checklist
Use the checklist to double check that every requirement is already in your artwork to avoid any issues or delays!



1 Comment
Abdul Mateen
April 14, 2015very nice description about bleed which make me confuse