
Using the Offset Path Tool in Adobe Illustrator
This tool is one of my favorites within Illustrator. It does exactly as the name suggests, it creates a duplicate of an object with the path set off by a specified distance. It can create replicas of different size with standard distances between the original and replica and easily creates concentric shapes. It is great for creating large or smaller versions of objects or creating outlines that are shapes. It is also great for creating outlines around large groups of objects and creating shadows that are actual objects that can be edited independently from the object that would be casting the shadow.
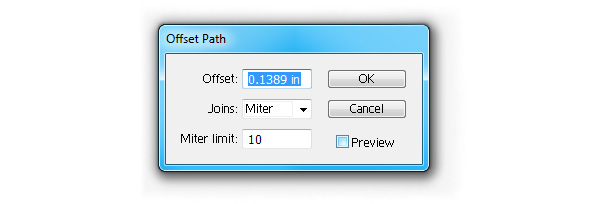
How to use the Offset Path Tool
The offset path tool can be accessed from the Adobe Illustrator Menu from Object >> Path >> Offset Path. It will open the offset path tool box that asks what distance to offset the path, what type of joins for the corners and the miter limit. The distance used in the Offset field can be entered as a positive or negative which will make a shape that is either larger or smaller than the original.
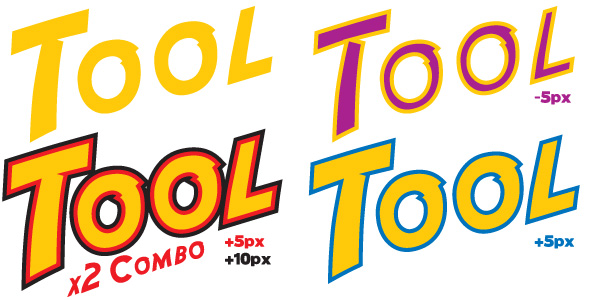
Different Offsets
In the above image the offset path tool is used to create multiple concentric copies of the original shape in different sizes. In the purple example I created a smaller concentric copy by using negative values, while in the blue example I used the a positive value to create a larger concentric copy.
The offset tool can even be used to create multiple copies that can sit within one another. This effect is achieved by applying the offset tool twice as shown in the red and black example.
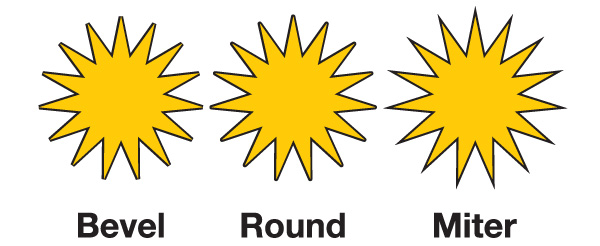
Different Join Types
The joins field in the offset path tool box modifies the type of angles the ends of the offset will have. There are three types, the miter which is a pointed corner, the round which is a rounded corner and the bevel which is a squared corner.
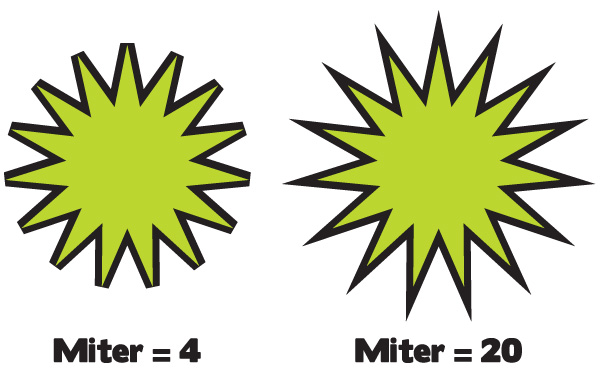
Miter Limit
The miter limit is how far the points can extrude from angles in the shape. Below there is an example of a high and low miter. The default is “4” which isn’t always the best for more acute angles. The second example with a miter of “20” actually allows for it to be much larger than what is displayed, so it is a bit of overkill.
The Difference Between Offset Path and Strokes
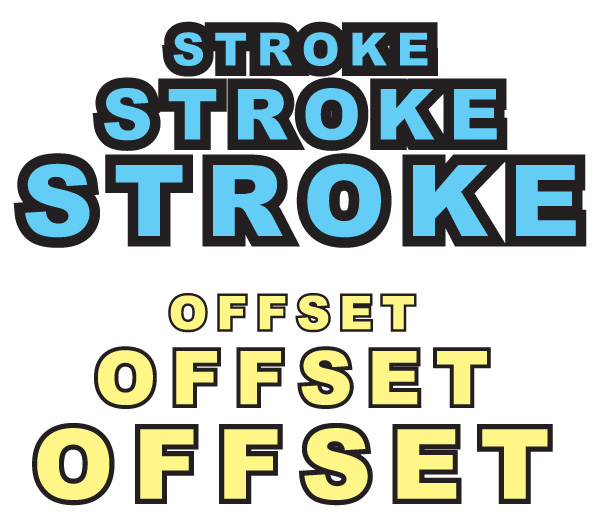
A similar effect can be created by applying a stroke to an object but a stroke and offset path are not the same, although they can look similar. The offset path is a replica that is evenly distanced from the original all around while the stroke is just an outline of a path. Also while resizing an object, the offset path will keep the proportions while the stroke will keep the same stroke size regardless of object size. Above we have an image of a stroke and an offset path around a line of text that has been reduced in size. Originally when the object was much larger they looked identical but as the object size changed more dramatically the stroke slowly became more out of place while the offset path still looks right. The stroke would have to be constantly adjusted or it would have to be outlined so that it can allow for size adjustments.
Using the Offset Path to Create Shadows
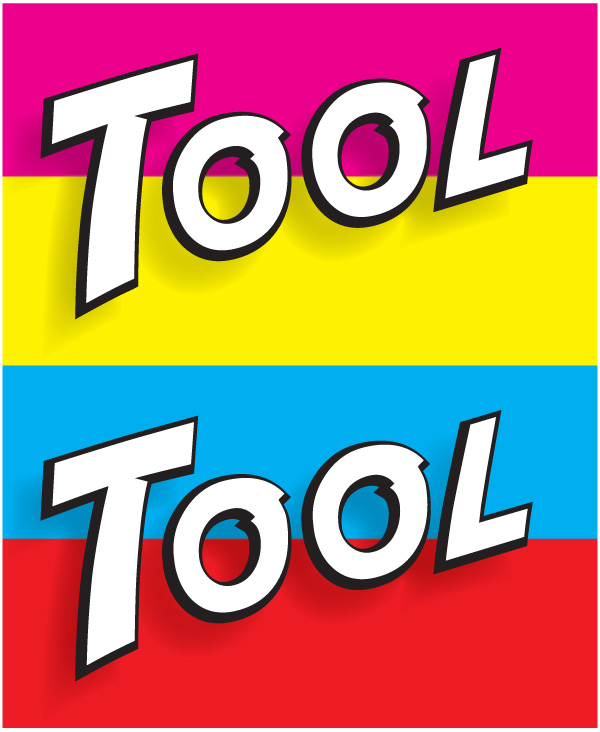
Creating an offset path of an object is a very handy way to create a shadow for that object. In the above graphic I created a shadow for the word tool by offsetting the graphic and then expanding it slightly. Afterward I used the feather on the offset and matched the color to the background. It isn’t hard and can create a nice shadow that is fully adjustable as an independent object.
Down the Right Path
The offset path tool is one of those tools that you do not hear much about but packs a big design punch when it comes to usefulness. Beyond the basic utilization illustrated in this post, the offset path tool can be used to create unique effects that can vary depending on the shape or object.
Please share any tips or tricks you may have discovered while using the offset path tool in the comments section!


13 Comments
Rekha Sharma
March 3, 2018Grateful for you comprehensive description of the offset paths. Thank you very much.
Jenny
February 11, 2016Amazing blog. For some reason, my offset path option is disabled on CS5. Is this common??
Oracle Training in Chennai
October 17, 2015Hi, Very nice blogs.We should be explain for this information is awesome.Thank you so much.
Lauren
June 24, 2015Can anyone tell me what font they have used in this tutorial? I really like it, but I don’t know where to find it! And thank you, this tutorial was very helpful.
Nyca
March 9, 2014Thanks for sharing such an easy to understand useful tips with attractive examples!
sambil
July 2, 2013Excellent tutorial. Something never to be forgotten. Great job!
Joe
June 25, 2013One of THE Best explained Tutorials I’ve read to date – TYSVM
Giovanni
April 26, 2013Robert you 100% correct, we can never stop learning. I just learned a few days ago that you can use the Recolor Artwork tool to make color groups easily right in Illustrator. I always use Kuler and bring the color palette to Illustrator… never again!
Glad you found this article helpful.
Robert Graham
April 26, 2013Most of us learn a software program to the poini we can get it to do what we want and stop learning. Few of us read the user manual cover to cover. I’ve been using Illustrator since Illustrator 88 and never knew this was possible! Duh. So many late nights I could have used this… Thanks.
Giovanni
March 18, 2013Thank you for the comment Paul, glad to be helpful!
Paul
March 15, 2013Thank you! :))
Oli
June 6, 2012I LOVE YOU, I’ve been trying to figure out how to do this for ages and struggled to find tutorials so far until I stumbled upon this!!!!!!
Vector
March 21, 2012This is awesome.Thanks for sharing such an useful tutorials